
In this blog post you will learn how to install OpenCV on Ubuntu 18.04.
In the past, I’ve authored a handful of installation guides for Ubuntu:
- Ubuntu 16.04: How to install OpenCV with Python 2.7 and Python 3.5+
- Install OpenCV 3.0 and Python 2.7+ on Ubuntu
- Install OpenCV 3.0 and Python 3.4+ on Ubuntu
- (…and be sure to see this page if you’re looking for macOS and Raspberry Pi installation guides)
The folks at Canonical have been working hard.
On April 26, 2018, they’ve released a new Long Term Support (LTS) version of Ubuntu for the community: Ubuntu 18.04 LTS (Bionic Beaver).
Support for Ubuntu 16.04 LTS continues until April 2021 so rest-assured — you don’t have to upgrade your 16.04 OS to continue working on your image processing projects.
That said, if you want to upgrade to Ubuntu 18.04 and use the latest-and-greatest, I think you’ll be quite pleased with the new changes in Ubuntu 18.04.
Let’s get down to business and install OpenCV with Python 3 bindings.
To learn how to stand up your Ubuntu 18.04 system with OpenCV, just keep reading.
Note: While you won’t see an Ubuntu 17.10 specific guide here on my blog (non-LTS), these instructions may work with 17.10 (you’ll just have to proceed at your own risk).
Ubuntu 18.04: How to install OpenCV
One major change in Ubuntu 18.04 is that they’ve dropped Python 2.7 completely.
You can still install Python 2.7 if-needed, but now Python 3 is the default on the OS.
Given that, this guide supports Python 3. If you need Python 2.7 support, read this entire guide first and then check the first question of the Troubleshooting your install (FAQ) section near the bottom of this blog post for some Python 2.7 pointers.
Step #0: Get comfortable — you’ll be using Python 3.6
Let’s familiarize ourselves with Python 3 on Ubuntu 18.04.
To run Python 3 on Ubuntu 18.04, you must call
python3explicitly.
Let’s see which version is installed on our system:
$ python3 --version
Python 3.6.5
And now, let’s launch a Python 3 shell just to test the waters:
$ python3
>> print("OpenCV + Ubuntu 18.04!")
OpenCV + Ubuntu 18.04!
>> quit()
That’s easy enough, so let’s get on with installing OpenCV on Ubuntu 18.04.
Step #1: Install OpenCV dependencies on Ubuntu 18.04
All steps today will be accomplished in the terminal/command line. Before we begin, open a terminal or connect via SSH.
From there, we need to refresh/upgrade the pre-installed packages/libraries with the apt-get package manager:
$ sudo apt-get update
$ sudo apt-get upgrade
Followed by installing developer tools:
$ sudo apt-get install build-essential cmake unzip pkg-config
You most likely already have
pkg-configinstalled on Ubuntu 18.04, but be sure to include it in the install command for sanity.
Next, we need to install some OpenCV-specific prerequisites. OpenCV is an image processing/computer vision library and therefore it needs to be able to load standard image file formats such as JPEG, PNG, TIFF, etc. The following image I/O packages will allow OpenCV to work with image files:
$ sudo apt-get install libjpeg-dev libpng-dev libtiff-dev
Similarly, let’s include video I/O packages as we often work with video on the PyImageSearch blog. You’ll need the following packages so you can work with your camera stream and process video files:
$ sudo apt-get install libavcodec-dev libavformat-dev libswscale-dev libv4l-dev
$ sudo apt-get install libxvidcore-dev libx264-dev
OpenCV’s highgui module relies on the GTK library for GUI operations. The highgui module will allow you to create elementary GUIs which display images, handle kepresses/mouse clicks, and create sliders and trackbars. Advanced GUIs should be built with TK, Wx, or QT. See this blog post to learn how to make an OpenCV GUI with TK.
Let’s install GTK:
$ sudo apt-get install libgtk-3-dev
I always recommend the following two libraries which will optimize various OpenCV functions:
$ sudo apt-get install libatlas-base-dev gfortran
And finally, our last requirement is to install Python 3 headers and libraries:
$ sudo apt-get install python3-dev
Step #2: Download the official OpenCV source
At the time of this writing, the most recent release is OpenCV 3.4.1. These instructions should continue to work with future OpenCV 3.x versions as well.
Since we’re continuing to work in the terminal, let’s download the official OpenCV release using
wget:
$ cd ~
$ wget -O opencv.zip https://github.com/opencv/opencv/archive/3.4.1.zip
Followed by the
opencv_contribmodule:
$ wget -O opencv_contrib.zip https://github.com/opencv/opencv_contrib/archive/3.4.1.zip
Note: If your browser is cutting off the full command either use the “<>” button in the toolbar above to expand the code block or copy and paste the following URL: https://github.com/opencv/opencv_contrib/archive/3.4.1.zip
So, what’s the contrib repo?
The contrib repository contains algorithms such as SIFT, SURF, and others. In the past, these implementations were included in the default installation of OpenCV 2.4; however, they were moved beginning with OpenCV 3+.
Modules that are actively being developed and/or modules that are patented (not free for commercial/industry use) are included in the contrib module. SIFT and SURF fall into this category. You can learn more about the thought process behind this move in the following blog post: Where did SIFT and SURF go in OpenCV 3?
Important: Both opencv
and opencv_contrib
versions mush be identical. Notice that both URLs point to 3.4.1. Feel free to install a different version while still using this guide — just be sure to update both URLs.
Now, let’s unzip the archives:
$ unzip opencv.zip
$ unzip opencv_contrib.zip

Figure 1: After downloading and unzipping opencv and opencv_contrib, our home directory listing should look similar to what is displayed in the terminal.
Step #3: Configure your Python 3 environment
The first step we’re taking to configure our Python 3 development environment is to install pip, a Python Package Manager.
To install pip, simply enter the following in your terminal:
$ wget https://bootstrap.pypa.io/get-pip.py
$ sudo python3 get-pip.py
Making use of virtual environments for Python development
If you are familiar with my blog and install guides therein, the following statement might make me sound like a broken record but I’ll repeat it anyway:
I use both virtualenv and virtualenvwrapper daily and you should too unless you have a very specific reason not to. These two Python packages facilitate creating independent Python environments for your projects.
It is a best practice to use virtual environments.
Why?
Virtual environments allow you to work on your projects in isolation without spinning up resource hogs such as VMs and Docker images (I definitely do use both VirtualBox and Docker — they have their place).
For example, maybe you have a Python + OpenCV project that requires an older version of scikit-learn (v0.14) but you want to keep using the latest version of scikit-learn (0.19) for all of your newer projects.
Using virtual environments, you could handle these two software version dependencies separately, something that is not possible using just the system install of Python.
If you would like more information about Python virtual environments take a look at this article on RealPython or read the first half of the this blog post on PyImageSearch.
Let’s go ahead and install
virtualenvand
virtualenvwrappernow:
$ sudo pip install virtualenv virtualenvwrapper
$ sudo rm -rf ~/get-pip.py ~/.cache/pip
To finish the install we need to update our
~/.bashrcfile.
Using a terminal text editor such as
vi/
vimor
nano, add the following lines to your
~/.bashrc:
# virtualenv and virtualenvwrapper
export WORKON_HOME=$HOME/.virtualenvs
export VIRTUALENVWRAPPER_PYTHON=/usr/bin/python3
source /usr/local/bin/virtualenvwrapper.sh
Alternatively, you can append the lines directly via bash commands:
$ echo -e "\n# virtualenv and virtualenvwrapper" >> ~/.bashrc
$ echo "export WORKON_HOME=$HOME/.virtualenvs" >> ~/.bashrc
$ echo "export VIRTUALENVWRAPPER_PYTHON=/usr/bin/python3" >> ~/.bashrc
$ echo "source /usr/local/bin/virtualenvwrapper.sh" >> ~/.bashrc
Next, source the
~/.bashrcfile:
$ source ~/.bashrc
Creating a virtual environment to hold OpenCV and additional packages
Ok, while that may have seemed like a lot of work, we’re at the point where we can create your Python 3 virtual environment for OpenCV:
$ mkvirtualenv cv -p python3
This line simply creates a Python 3 virtual environment named
cv. You can name your environment(s) whatever you’d like — I like to keep them short and sweet while also providing enough information so I’ll remember what they are for. You can have as many virtual environments on your system as you’d like!
Let’s verify that we’re in the cv environment by using the workon command:
$ workon cv
Figure 2 shows what your terminal will look like (assuming you haven’t changed any bash prompt settings):
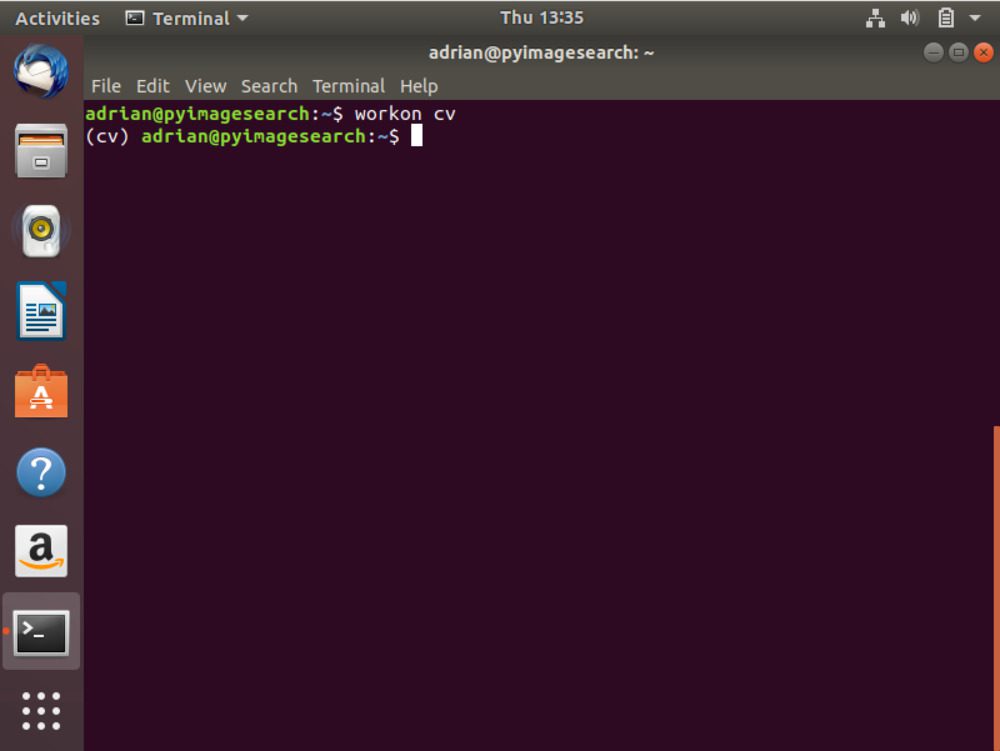
Figure 2: If you see the (cv) at the beginning of the bash prompt, then your virtual environment is active and you’re working “inside” the environment. You can now safely install OpenCV with correct Python bindings.
Install NumPy in your environment
Let’s install our first package into the environment: NumPy. NumPy is a requirement for working with Python and OpenCV. We simply use pip (while the
cvPython virtual environment is active):
$ pip install numpy
Step #4: Configure and compile OpenCV for Ubuntu 18.04
Now we’re moving. We’re ready to compile and install OpenCV.
Before we begin though, let’s ensure that we’re in the cv virtual environment:
$ workon cv
It is very important that the virtual environment is active (you are “inside” the virtual environment) which is why I keep reiterating it. If you are not in the
cvPython virtual environment before moving on to the next step your build files will not be generated properly.
Configure OpenCV with CMake
Let’s set up our OpenCV build using
cmake:
$ cd ~/opencv-3.4.1/
$ mkdir build
$ cd build
$ cmake -D CMAKE_BUILD_TYPE=RELEASE \
	-D CMAKE_INSTALL_PREFIX=/usr/local \
	-D INSTALL_PYTHON_EXAMPLES=ON \
	-D INSTALL_C_EXAMPLES=OFF \
	-D OPENCV_EXTRA_MODULES_PATH=~/opencv_contrib-3.4.1/modules \
	-D PYTHON_EXECUTABLE=~/.virtualenvs/cv/bin/python \
	-D BUILD_EXAMPLES=ON ..
I always recommend that you scroll through the CMake output and check to see if anything looks out of the ordinary. You won’t see a “YES” marked next to every setting — that is normal. Be sure you don’t see any errors or your compile may fail (warnings are okay).

Figure 3: To compile OpenCV for Ubuntu 18.04, we make use of CMake. The CMake tool will configure settings prior to compilation.
Take a moment to notice that only “Python 3” section is shown in the CMake output on Ubuntu 18.04 in Figure 3. This is by design as we are only compiling OpenCV with Python 3 support.
Note: If you are encountering problems related to stdlib.h: No such file or directory
during either the cmake
or make
phase of this tutorial you’ll also need to include the following option to CMake: -D ENABLE_PRECOMPILED_HEADERS=OFF
. In this case I would suggest deleting your build directory, re-creating it, and then re-running cmake
with the above option included. This will resolve the stdlib.h
error.
Compiling OpenCV on Ubuntu 18.04
Let’s compile OpenCV using
make.
Depending on the number of processors/cores, you may be able to reduce compile time by altering the flag in the command. My computer has 4 cores, so I am using the
-j4flag. You can update the numeral or leave the flag off altogether:
$ make -j4

Figure 4: To compile OpenCV with Python 3 on Ubuntu 18.04, we use make. Using make compiles OpenCV from source and is preferred over using package managers for installing OpenCV.
This process may take 30 minutes or longer, so go for a nice walk if you are able.
If your compile chokes and hangs, it may be due to a threading race condition. In the event you run into this problem, simply delete your
builddirectory, recreate it, and re-run
cmakeand
make. This time do not include the flag next to
make.
Installing and verifying OpenCV
Upon a successful, 100% complete compile you can now install OpenCV:
$ sudo make install
$ sudo ldconfig
To verify the install, sometimes I like to enter the following command in the terminal:
$ pkg-config --modversion opencv
3.4.1
Step #5: Finish your Python+ OpenCV + Ubuntu 18.04 install
We’ve reached the last lap of the race so stick with it.
At this point, your Python 3 bindings for OpenCV should reside in the following folder:
$ ls /usr/local/lib/python3.6/site-packages/
cv2.cpython-36m-x86_64-linux-gnu.so
Let’s rename them to simply
cv2.so:
$ cd /usr/local/lib/python3.6/site-packages/
$ sudo mv cv2.cpython-36m-x86_64-linux-gnu.so cv2.so
Our last step is to sym-link our OpenCV
cv2.sobindings into our
cvvirtual environment:
$ cd ~/.virtualenvs/cv/lib/python3.6/site-packages/
$ ln -s /usr/local/lib/python3.6/site-packages/cv2.so cv2.so
Step #6: Testing your OpenCV install on Ubuntu 18.04
The race is done, but let’s verify that we’re firing on all cylinders.
To verify that our OpenCV + Ubuntu install is complete, I like to launch Python, import OpenCV, and query for the version (this is useful for sanity if you have multiple versions of OpenCV installed as well):
$ cd ~
$ workon cv
$ python
Python 3.6.5 (default, Apr 1 2018, 05:46:30)
[GCC 7.3.0] on linux
Type "help", "copyright", "credits" or "license" for more information.
>>> import cv2
>>> cv2.__version__
'3.4.1'
>>> quit()
Here’s what it looks like on my system:

Figure 5: To verify that OpenCV is correctly installed and configured in our Python 3 virtual environment, I like to run the Python interpreter in the terminal. From there you can import OpenCV (cv2) and verify the version number matches what you intended to install.
Optionally, at this point, you can safely delete the zips and directories in your home folder:
$ cd ~
$ rm opencv.zip opencv_contrib.zip
$ rm -rf opencv-3.4.1 opencv_contrib-3.4.1
Troubleshooting your install (FAQ)
In this section, I address some of the common questions, problems, and issues that arise when installing OpenCV 3 with Python 3 on Ubuntu 18.04 LTS.
Q. Where is Python 2.7 on Ubuntu 18.04?
A. Python 3 is the default and what comes with Ubuntu 18.04. Python 2.7 users can manually install Python 2.7 at the end of Step #1:
$ sudo apt-get install python2.7 python2.7-dev
From there, when you create your virtual environment in Step #3, first install pip for Python 2.7:
$ sudo python2.7 get-pip.py
And then (also in Step #3) when you make your virtual environment, simply use the relevant Python version flag:
$ mkvirtualenv cv -p python2.7
From there everything should be the same.
Q. Why can’t I just pip to install OpenCV?
A. There are a number of pip-installable versions of OpenCV available depending on your operating system and architecture. The problem you may run into is that they may be compiled without various optimizations, image I/O support, video I/O support, and
opencv_contribsupport. Use them — but use them at your own risk. This tutorial is meant to give you the full install of OpenCV on Ubuntu 18.04 while giving you complete control over the compile.
Q. When I execute
mkvirtualenvor
workon, I encounter a “command not found error”.
A. There a number of reasons why you would be seeing this error message, all of come from to Step #3:
- First, make sure you have installed
virtualenv
andvirtualenvwrapper
properly using thepip
package manager. Verify by runningpip freeze
, and ensure that you see bothvirtualenv
andvirtualenvwrapper
in the list of installed packages. - Your
~/.bashrc
file may have mistakes. View the contents of your~/.bashrc
file to see the properexport
andsource
commands are present (check Step #3 for the commands that should be appended to~/.bashrc
). - You may have forgotten to
source
your~/.bashrc
. Make sure you runsource ~/.bashrc
after editing it to ensure you have access to themkvirtualenv
andworkon
commands.
Q. When I open a new terminal, logout, or reboot my Ubuntu system, I cannot execute the
mkvirtualenvor
workoncommands.
A. See #2 from the previous question.
Q. When I try to import OpenCV, I encounter this message:
Import Error: No module named cv2.
A. There are multiple reasons this could be happening and unfortunately, it is hard to diagnose. I recommend the following suggestions to help diagnose and resolve the error:
- Make sure your
cv
virtual environment is active by using theworkon cv
command. If this command gives you an error, then see the first question in this FAQ. - Try investigating the contents of the
site-packages
directory in yourcv
virtual environment. You can find thesite-packages
directory in~/.virtualenvs/cv/lib/python3.6/site-packages/
depending on your Python version. Make sure (1) there is acv2.so
file in thesite-packages
directory and (2) it’s properly sym-linked to a valid file. - Be sure to check the
site-packages
(and evendist-packages
) directory for the system install of Python located in/usr/local/lib/python3.6/site-packages/
, respectively. Ideally, you should have acv2.so
file there. - As a last resort, check in your
build/lib
directory of your OpenCV build. There should be acv2.so
file there (if bothcmake
andmake
executed without error). If thecv2.so
file is present, manually copy it into both the systemsite-packages
directory as well as thesite-packages
directory for thecv
virtual environment.
What’s possible with OpenCV?
The possibilities with OpenCV are truly endless.
Perhaps you’re interested in tracking object movement:
Figure 6: We can use OpenCV to track the motion of objects in real time!
Or maybe you’d like to use OpenCV + deep learning to detect faces in images/video? Trust me, it’s easier than it sounds!
Figure 7: Detecting faces in realtime with OpenCV is easier than it sounds.
Or maybe you’re looking for a beginner-level book, designed for newcomers to the world of computer vision?
If so, look no further than my book, Practical Python and OpenCV + Case Studies.

Figure 8: Practical Python and OpenCV + Case Studies is a book meant for beginners but it is also useful for those that want to solidify their knowledge of the fundamentals. Be sure to give it a read!
Inside this book you’ll:
- Master the fundamentals of computer vision and image processing, taught on a fun, hands-on manner.
- Learn by doing, including visual examples and lots of code (including line-by-line reviews, ensuring you understand exactly what’s going on).
- Implement case studies, including face detection, object tracking, handwriting recognition, and more!
To learn more about the book (and how it can help you learn computer vision + OpenCV), just click here!
Summary
Today we installed OpenCV 3 with Python 3 bindings on Ubuntu 18.04 LTS.
I hope you found these instructions helpful on getting your own Ubuntu 18.04 machine configured with OpenCV 3.
If you’re interested in learning more about OpenCV, computer vision, and image processing, be sure to enter your email address in the form below to be notified when new blog posts + tutorials are published!
The post Ubuntu 18.04: How to install OpenCV appeared first on PyImageSearch.