A couple weeks ago I provided step-by-step install instructions to setup OpenCV 3.0 and Python 2.7+ on your Ubuntu machine.
However, one of the huge benefits of migrating to OpenCV 3.0 is the new Python 3.4+ support. In the previous 2.4.X releases of OpenCV, only Python 2.7+ was supported. But now, we can finally leverage Python 3.4+ in our new projects.
In the remainder of this blog post, I’ll detail how to install OpenCV 3.0 with Python 3.4+ bindings on your Ubuntu 14.04+ system. If you have followed along from the previous tutorial, you’ll notice that many of the steps are the same (or at least very similar), so I have condensed this article a bit. That said, be sure to pay special attention when we start working with CMake later in this tutorial to ensure you are compiling OpenCV 3.0 with Python 3.4+ support!
How to Install OpenCV 3.0 and Python 3.4+ on Ubuntu
A few weeks ago I covered how to install OpenCV 3.0 and Python 2.7+ on Ubuntu, and while this was a great tutorial (since many of us are still using Python 2.7), I think it’s really missing out on one of the major aspects of OpenCV 3.0 — Python 3.4+ support!
That’s right, up until the v3.0 release, OpenCV only provided bindings to the Python 2.7 programming language.
And for many of us, that was okay. As scientific developers and researchers, it’s a pretty standard assumption that we’ll be sequestered to Python 2.7.
However, that’s starting to change. Important scientific libraries such as NumPy, SciPy, and scikit-learn are now providing Python 3 support. And now OpenCV 3.0 joins the ranks!
In general, you’ll find this tutorial very similar to the previous one on installing OpenCV 3.0 and Python2.7 on Ubuntu, so I’m going to condense my explanations of each of the steps as necessary. If you would like to full explanation of each step, please refer to the previous OpenCV 3.0 article. Otherwise, simply follow along with this tutorial and you’ll have OpenCV 3.0 and Python 3.4+ installed on your Ubuntu system in less than 10 minutes.
Step 1: Install prerequisites
Upgrade any pre-installed packages:
$ sudo apt-get update
$ sudo apt-get upgrade
Install developer tools used to compile OpenCV 3.0:
$ sudo apt-get install build-essential cmake git pkg-config
Install libraries and packages used to read various image formats from disk:
$ sudo apt-get install libjpeg8-dev libtiff4-dev libjasper-dev libpng12-dev
Install a few libraries used to read video formats from disk:
$ sudo apt-get install libavcodec-dev libavformat-dev libswscale-dev libv4l-dev
Install GTK so we can use OpenCV’s GUI features:
$ sudo apt-get install libgtk2.0-dev
Install packages that are used to optimize various functions inside OpenCV, such as matrix operations:
$ sudo apt-get install libatlas-base-dev gfortran
Step 2: Setup Python (Part 1)
Let’s get
pip, a Python package manager, installed for Python 3:
$ wget https://bootstrap.pypa.io/get-pip.py
$ sudo python3 get-pip.py
Note that I have specifically indicated python3
when installing
pip. If you do not supply
python3, then Ubuntu will attempt to install
pipon your Python 2.7 distribution, which is not our desired intention.
Alright, so I’ve said it before on the PyImageSearch blog, and I’ll see it again. You should really be using virtual environments for Python development!
We’ll be using virtualenv and virtualenvwrapper in this tutorial. These packages allow us to create entirely separate and independent Python environments, ensuring that we don’t junk up our system Python install (and more importantly, so we can have a separate Python environment for each of our projects).
Let’s use our fresh
pip3install to setup
virtualenvand
virtualenvwrapper:
$ sudo pip3 install virtualenv virtualenvwrapper
Again, notice how I am specifying
pip3instead of just
pip— I’m just making it explicitly obvious that these packages should be installed for Python 3.4.
Now we can update our
~/.bashrcfile (place at the bottom of the file):
# virtualenv and virtualenvwrapper
export VIRTUALENVWRAPPER_PYTHON=/usr/bin/python3
export WORKON_HOME=$HOME/.virtualenvs
source /usr/local/bin/virtualenvwrapper.sh
Notice how I am pointing
VIRTUALENVWRAPPER_PYTHONto where our Python 3 binary lives on our Ubuntu system.
To make these changes take affect, you can either open up a new terminal or reload your
~/.bashrcfile:
$ source ~/.bashrc
Finally, let’s create our
cvvirtual environment where we’ll be doing our computer vision development using OpenCV 3.0 and Python 3.4:
$ mkvirtualenv cv
Step 2: Setup Python (Part 2)
We’re halfway done setting up Python. But in order to compile OpenCV 3.0 with Python 3.4+ bindings, we’ll need to install the Python 3.4+ headers and development files:
$ sudo apt-get install python3.4-dev
OpenCV represents images as NumPy arrays, so we need to install NumPy into our
cvvirtual environment:
$ pip install numpy
If you end up getting a Permission denied error related to pip’s
.cachedirectory, like this:
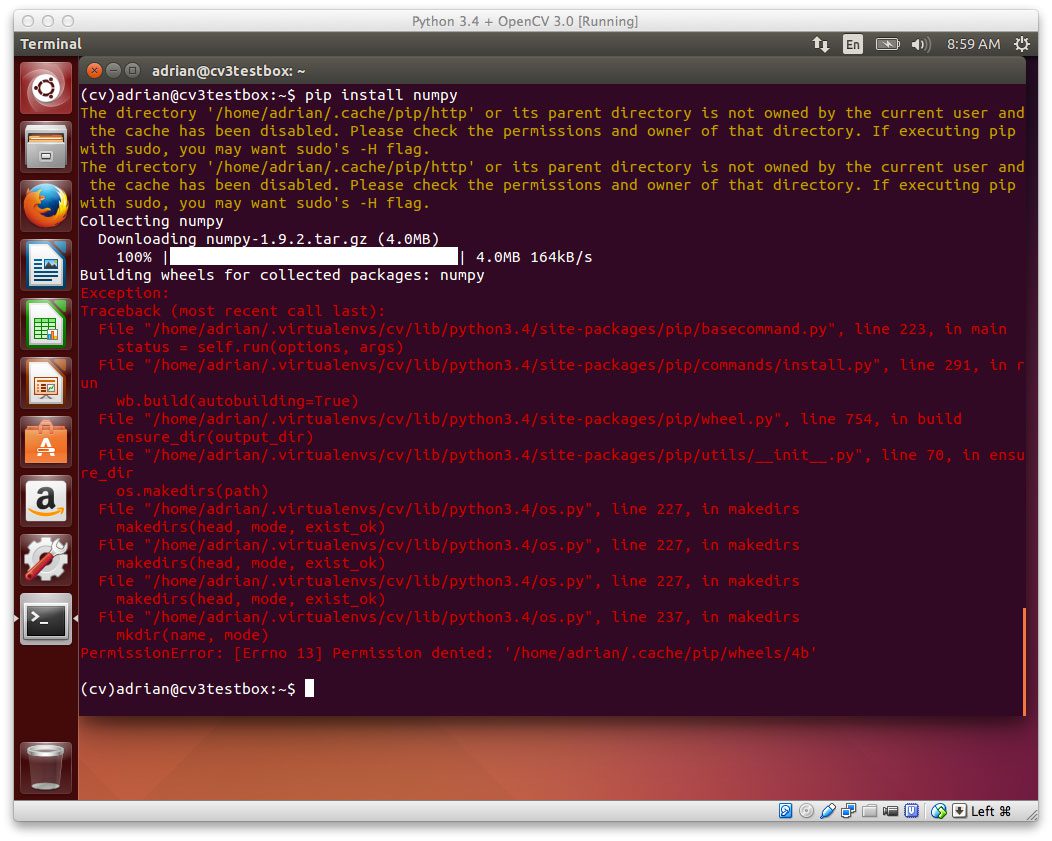
Figure 1: If you get a “Permission Denied” error, no worries — that’s an easy fix!
Then simply delete the cache directory and re-run the NumPy install command:
$ sudo rm -rf ~/.cache/pip/
$ pip install numpy
And you should now have a nice clean install of NumPy:
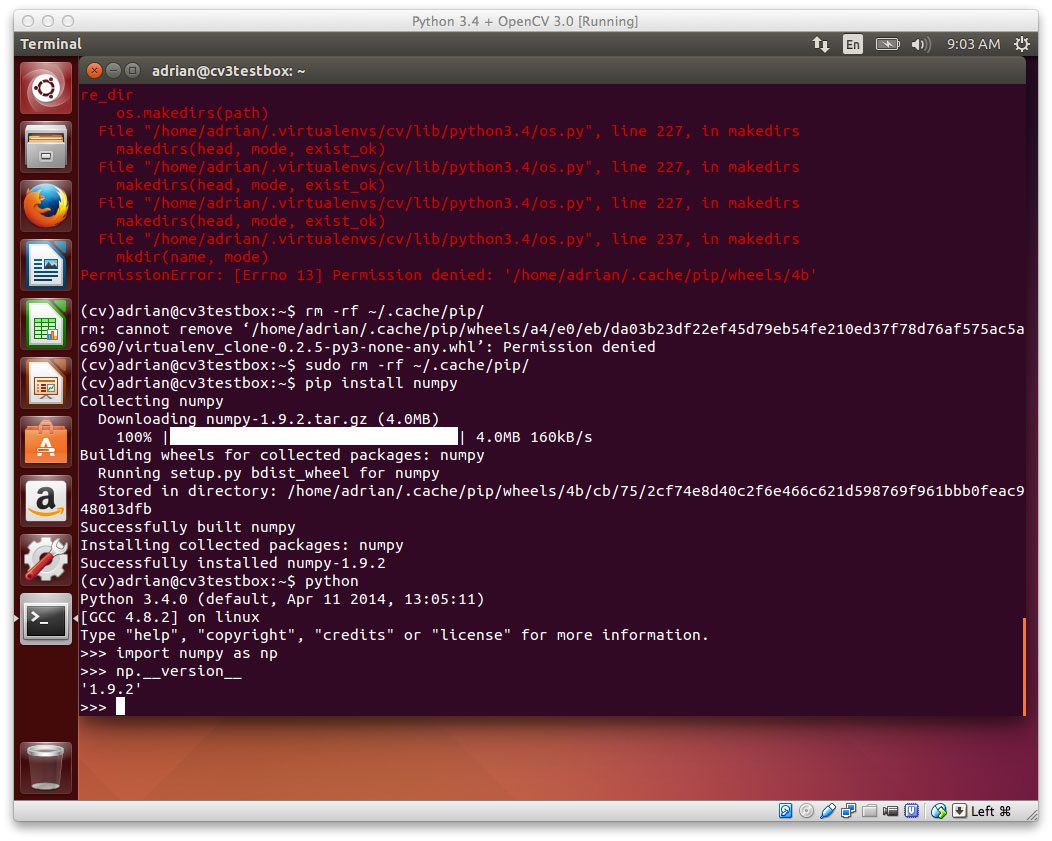
Figure 2: Deleting the .cache/pip directory and re-running pip install numpy will take care of the problem.
Step 3: Build and install OpenCV 3.0 with Python 3.4+ bindings
Alright, our system is all setup now! Let’s pull down OpenCV from GitHub and checkout the
3.0.0version:
$ cd ~
$ git clone https://github.com/Itseez/opencv.git
$ cd opencv
$ git checkout 3.0.0
We’ll also need to grab the opencv_contrib repo as well (for more information as to why we need
opencv_contrib, take a look at my previous OpenCV 3.0 Ubuntu install post):
$ cd ~
$ git clone https://github.com/Itseez/opencv_contrib.git
$ cd opencv_contrib
$ git checkout 3.0.0
Time to setup the build:
$ cd ~/opencv
$ mkdir build
$ cd build
$ cmake -D CMAKE_BUILD_TYPE=RELEASE \
	-D CMAKE_INSTALL_PREFIX=/usr/local \
	-D INSTALL_C_EXAMPLES=ON \
	-D INSTALL_PYTHON_EXAMPLES=ON \
	-D OPENCV_EXTRA_MODULES_PATH=~/opencv_contrib/modules \
	-D BUILD_EXAMPLES=ON ..
Let’s take a second to look at my CMake output:
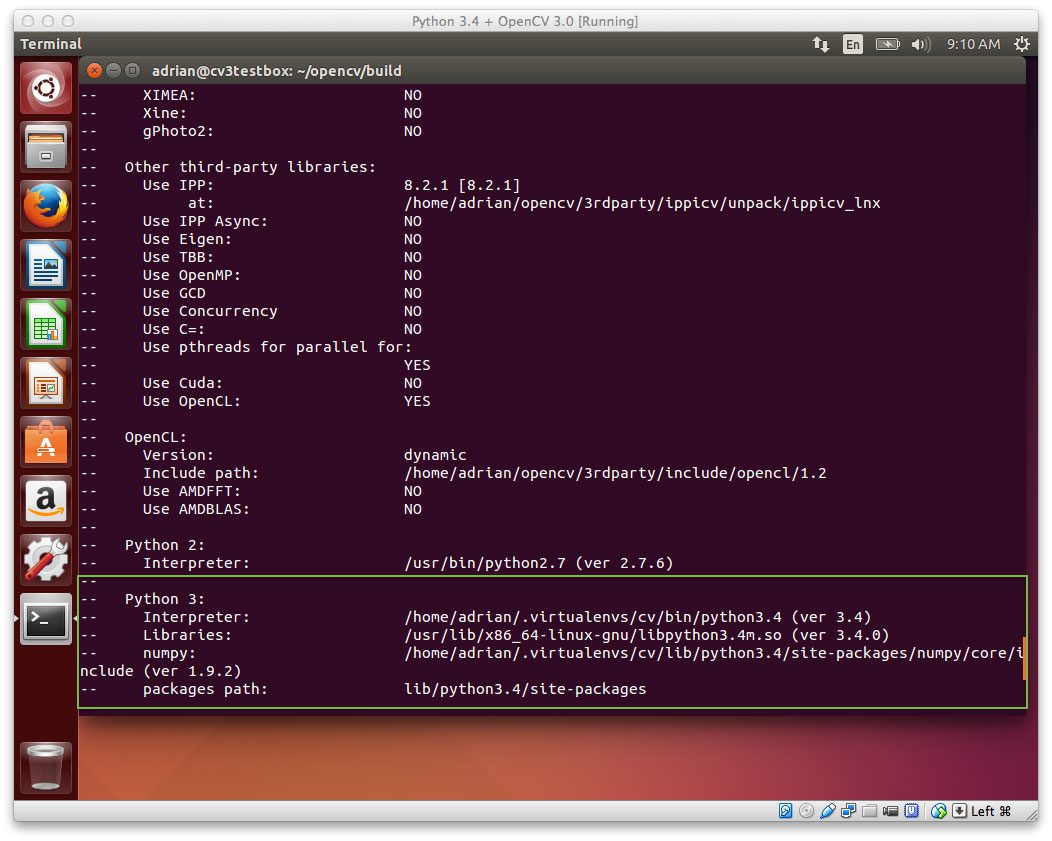
Figure 3: It’s a good idea to inspect the output of CMake to ensure the proper Python 3 interpreter, libraries, etc. have been picked up.
Notice how CMake has been able to pick up our Python 3 interpreter! This indicates that OpenCV 3.0 will be compiled with our Python 3.4+ bindings.
Speaking of compiling, let’s go ahead and kickoff the OpenCV compile process:
$ make -j4
Where the 4 can be replaced with the number of available cores on your processor to speedup the compilation time.
Assuming OpenCV 3.0 compiled without error, you can now install it on your system:
$ sudo make install
$ sudo ldconfig
Step 4: Sym-link OpenCV 3.0
If you’ve reached this step, OpenCV 3.0 should now be installed in
/usr/local/lib/python3.4/site-packages/
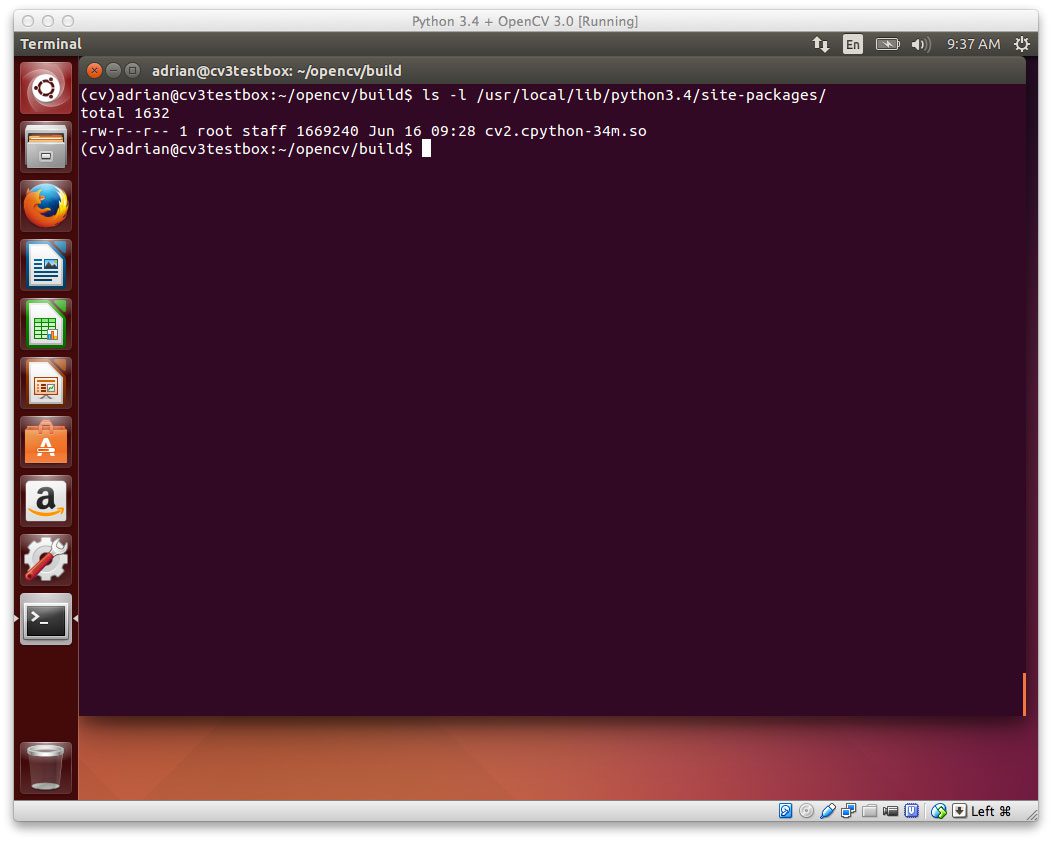
Figure 4: The Python 3.4+ OpenCV 3.0 bindings are now installed in /usr/local/lib/python3.4/site-packages/
Here, our OpenCV bindings are stored under the name
cv2.cpython-34m.so
Be sure to take note of this filename, you’ll need it in just a few seconds!
However, in order to use OpenCV 3.0 within our
cvvirtual environment, we first need to sym-link OpenCV into the
site-packagesdirectory of the
cvenvironment, like this:
$ cd ~/.virtualenvs/cv/lib/python3.4/site-packages/
$ ln -s /usr/local/lib/python3.4/site-packages/cv2.cpython-34m.so cv2.so
Notice how I am changing the name from
cv2.cpython-34m.soto
cv2.so— this is so Python can import our OpenCV bindings using the name
cv2.
So now when you list the contents of the
cvvirtual environment’s
site-packagesdirectory, you’ll see our OpenCV 3.0 bindings (the
cv2.sofile):
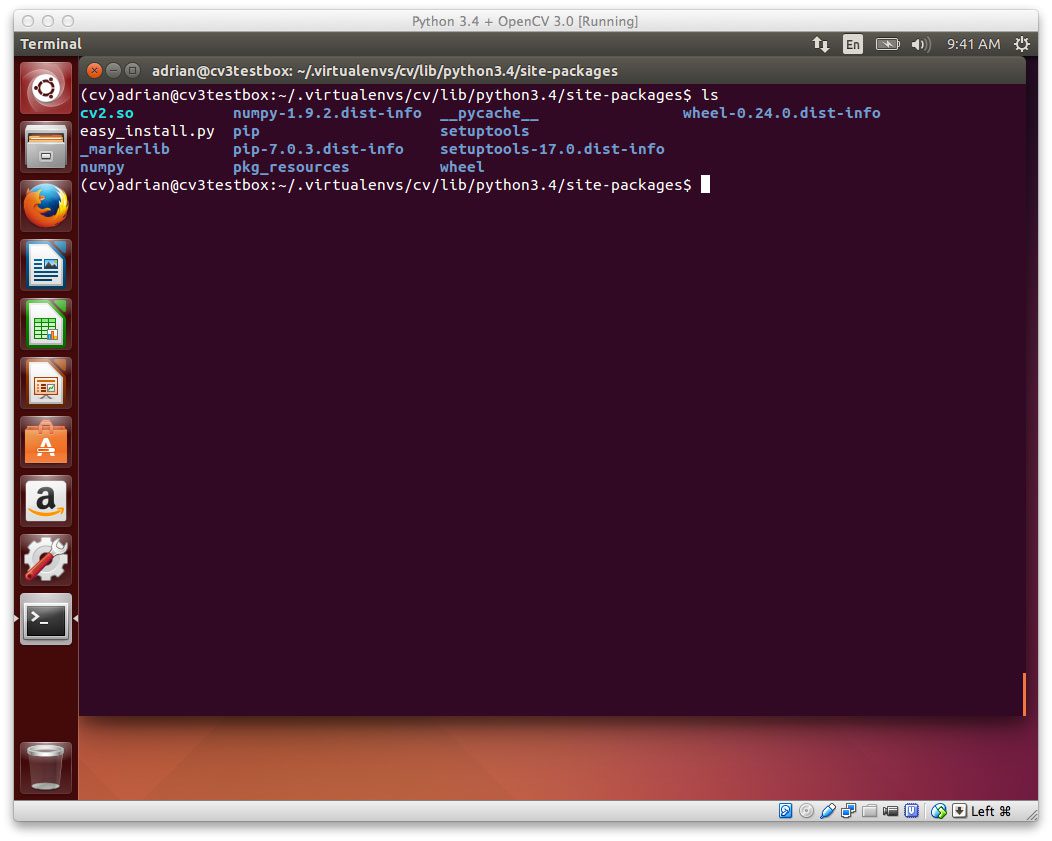
Figure 5: In order to access the OpenCV 3.0 bindings from our Python 3.4+ interpreter, we need to sym-link the cv2.so file into our site-packages directory.
Again, this is a very important step, so be sure that you have the cv2.so
file in your virtual environment, otherwise you will not be able to import OpenCV in your Python scripts!
Step 5: Test out the OpenCV 3.0 and Python 3.4+ install
Nice work! You have successfully installed OpenCV 3.0 with Python 3.4+ bindings (and virtual environment support) on your Ubuntu system!
But before we break out the champagne and beers, let’s confirm the installation has worked. First, ensure you are in the
cvvirtual environment, then fire up Python 3 and try to import
cv2:
$ workon cv
$ python
>>> import cv2
>>> cv2.__version__
'3.0.0'
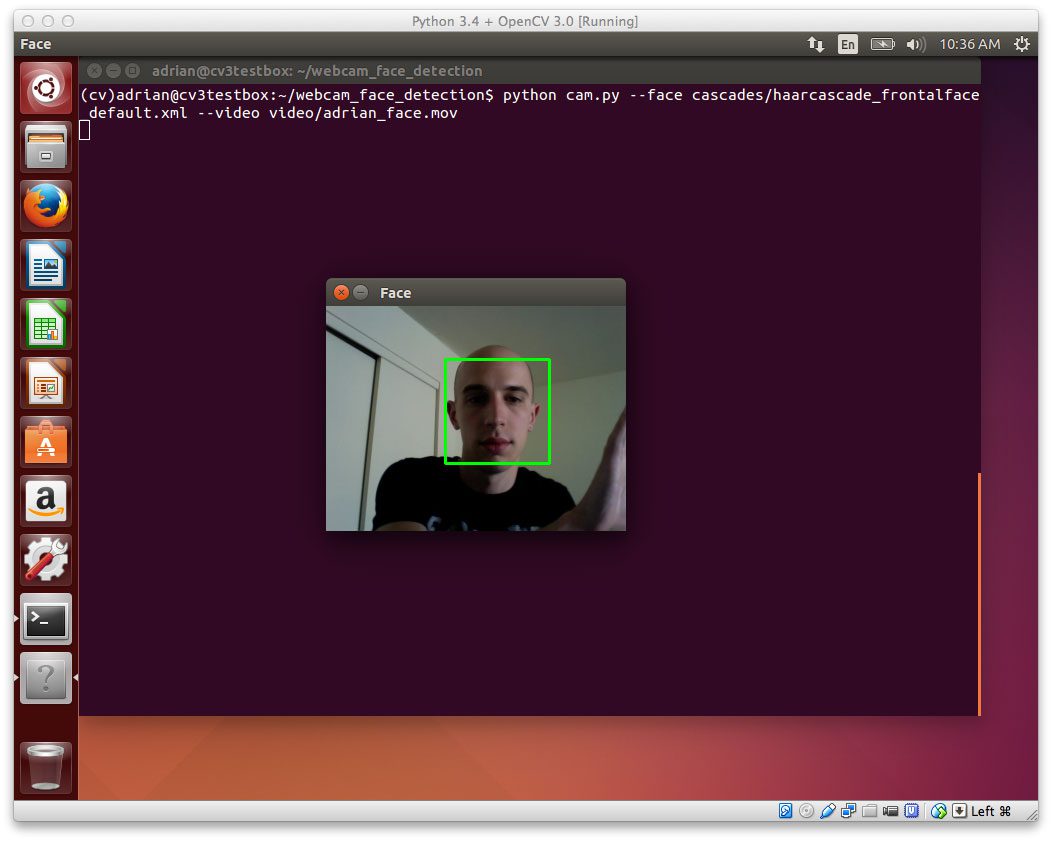
Here’s an example of me importing OpenCV 3.0 using Python 3.4+ on my own Ubuntu system:
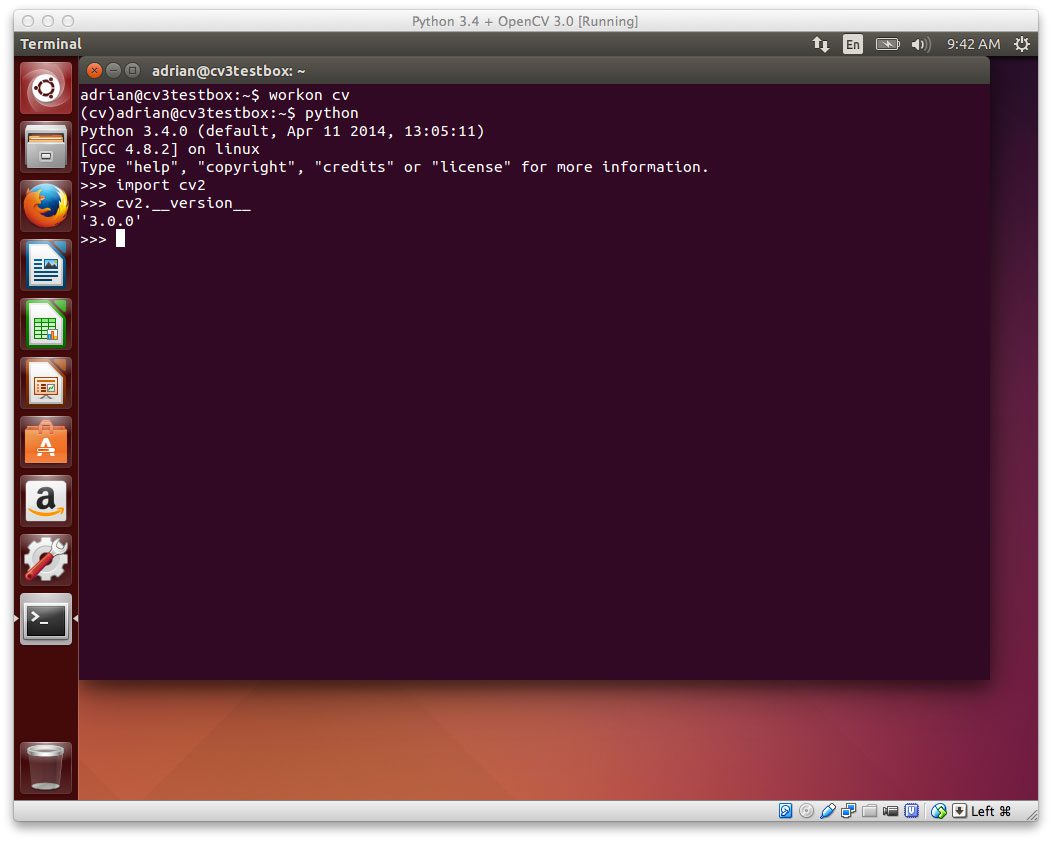
Figure 6: OpenCV 3.0 with Python 3.4+ bindings has been successfully installed on the Ubuntu system!
As you can see, OpenCV 3.0 with Python 3.4+ bindings has been successfully installed on my Ubuntu system!
Summary
In this tutorial I have demonstrated how to install OpenCV 3.0 with Python 3.4+ bindings on your Ubuntu system. This article is very similar to our previous tutorial on installing OpenCV 3.0 and Python 2.7 on Ubuntu, but takes advantage of OpenCV 3.0’s new Python 3+ support, ensuring that we can use the Python 3 interpreter in our work.
While having Python 3.4+ support is really awesome and is certainly the future of the Python programming language, I would also advise you to take special care when considering migrating from Python 2.7 to Python 3.4. For many scientific developers, the move from Python 2.7 to 3.4 has been a slow, arduous one. While the big Python packages such as NumPy, SciPy, and scikit-learn have made the switch, there are still other smaller libraries that are dependent on Python 2.7. That said, if you’re a scientific developer working in computer vision, machine learning, or data science, you’ll want to be careful when moving to Python 3.4 as you could easily pigeonhole your research.
Over the coming weeks the OpenCV 3.0 install-fest will continue, so if you would like to receive email updates when new install tutorials are released (such as installing OpenCV 3.0 with Homebrew, installing OpenCV 3.0 on the Raspberry Pi, and more), please enter your email address in the form below.
The post Install OpenCV 3.0 and Python 3.4+ on Ubuntu appeared first on PyImageSearch.