One of my favorite parts of running the PyImageSearch blog is a being able to link together previous blog posts and create a solution to a particular problem — in this case, real-time panorama and image stitching with Python and OpenCV.
Over the past month and a half, we’ve learned how to increase the FPS processing rate of builtin/USB webcams and the Raspberry Pi camera module. We also learned how to unify access to both USB webcams and the Raspberry Pi camera into a single class, making all video processing and examples on the PyImageSearch blog capable of running on both USB and Pi camera setups without having to modify a single line of code.
And just to weeks ago, we discussed how keypoint detection, local invariant descriptors, keypoint matching, and homography matrix estimation can be used to construct panoramas and stitch images together.
Today we are going to link together the past 1.5 months worth of posts and use them to perform real-time panorama and image stitching using Python and OpenCV. Our solution will be able to run on both laptop/desktops systems, along with the Raspberry Pi.
Furthermore, we’ll also apply our basic motion detection implementation from last week’s post to perform motion detection on the panorama image.
This solution is especially useful in situations where you want to survey a wide area for motion, but don’t want “blind spots” in your camera view.
Looking for the source code to this post?
Jump right to the downloads section.
Keep reading to learn more…
Real-time panorama and image stitching with OpenCV
As I mentioned in the introduction to this post, we’ll be linking together concepts we have learned in the previous 1.5 months of PyImageSearch posts and:
- Use our improved FPS processing rate Python classes to access our builtin/USB webcams and/or the Raspberry Pi camera module.
- Access multiple camera streams at once.
- Apply image stitching and panorama construction to the frames from these video streams.
- Perform motion detection in the panorama image.
Again, the benefit of performing motion detection in the panorama image versus two separate frames is that we won’t have any “blind spots” in our field of view.
Hardware setup
For this project, I’ll be using my Raspberry Pi 2, although you could certainly use your laptop or desktop system instead. I simply went with the Pi 2 for it’s small form factor and ease of maneuvering in space constrained places.
I’ll also be using my Logitech C920 webcam (that is plug-and-play compatible with the Raspberry Pi) along with the Raspberry Pi camera module. Again, if you decide to use your laptop/desktop system, you can simply hook-up multiple webcams to your machine — the same concepts discussed in this post still apply.
Below you can see my setup:
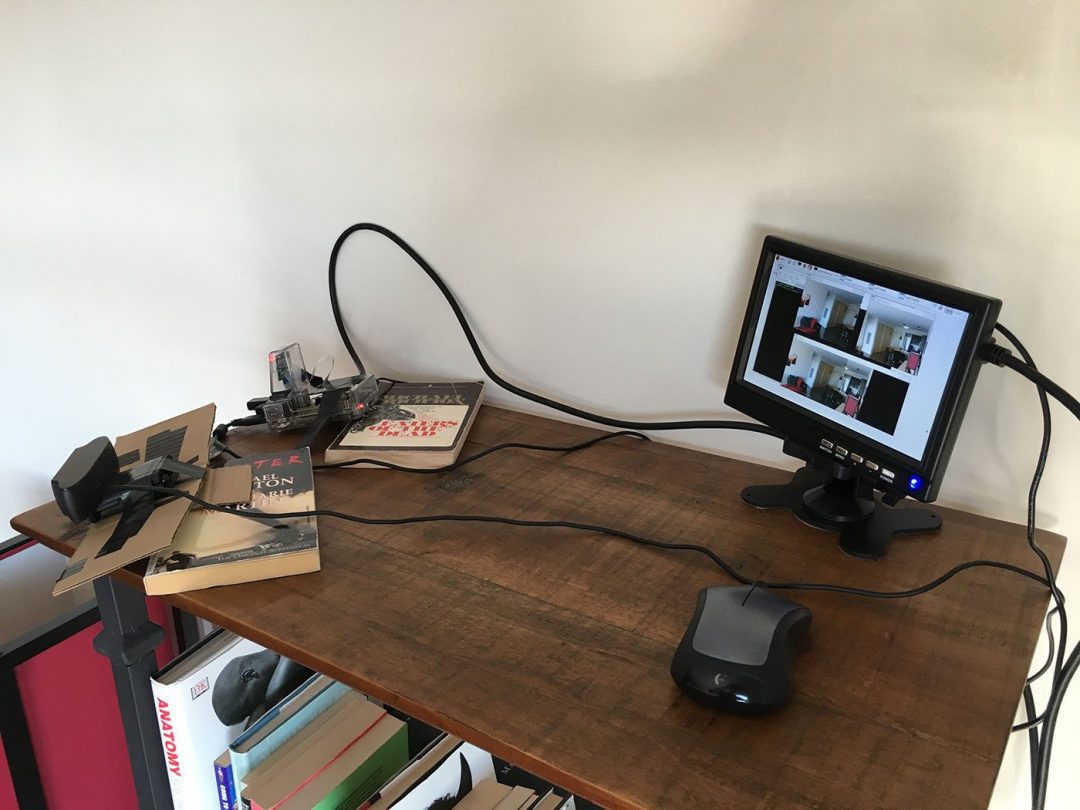
Figure 1: My the Raspberry Pi 2 + USB webcam + Pi camera module setup.
Here is another angle looking up at the setup:
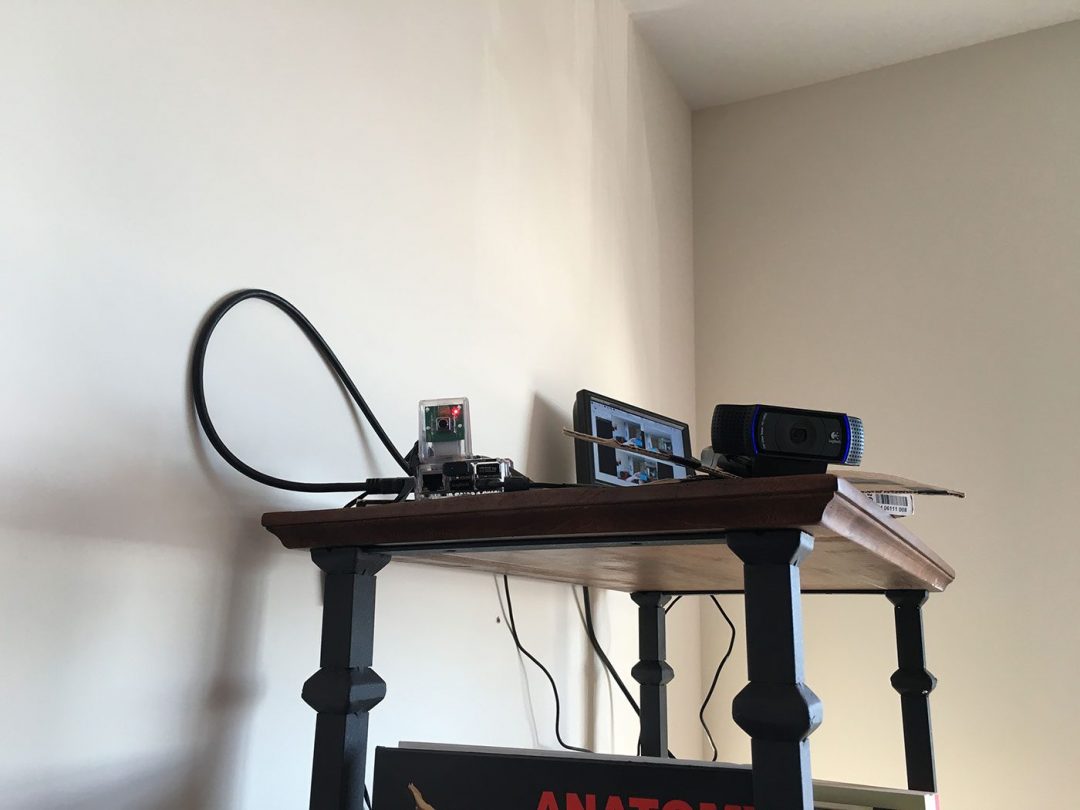
Figure 2: Placing my setup on top of a bookcase so it has a good viewing angle of my apartment.
The setup is pointing towards my front door, kitchen, and hallway, giving me a full view of what’s going on inside my apartment:
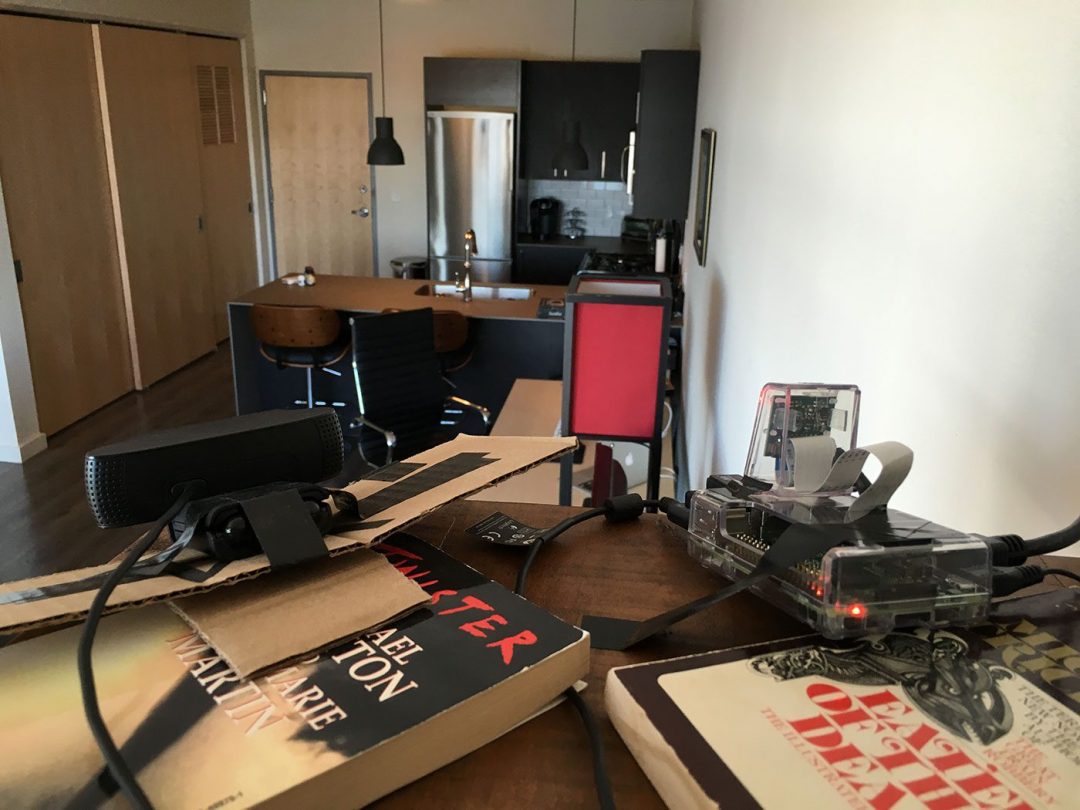
Figure 3: Getting ready for real-time panorama construction.
The goal is to take frames captured from both my video streams, stitch them together, and then perform motion detection in the panorama image.
Constructing a panorama, rather than using multiple cameras and performing motion detection independently in each stream ensures that I don’t have any “blind spots” in my field of view.
Project structure
Before we get started, let’s look at our project structure:
|--- pyimagesearch
|    |---- __init__.py
|    |--- basicmotiondetector.py
|    |--- panorama.py
|--- realtime_stitching.py
As you can see, we have defined a
pyimagesearchmodule for organizational purposes. We then have the
basicmotiondetector.pyimplementation from last week’s post on accessing multiple cameras with Python and OpenCV. This class hasn’t changed at all, so we won’t be reviewing the implementation in this post. For a thorough review of the basic motion detector, be sure to read last week’s post.
We then have our
panorama.pyfile which defines the
Stitcherclass used to stitch images together. We initially used this class in the OpenCV panorama stitching tutorial.
However, as we’ll see later in this post, I have made a slight modifications to the constructor and
stitchmethods to facilitate real-time panorama construction — we’ll learn more about these slight modifications later in this post.
Finally, the
realtime_stitching.pyfile is our main Python driver script that will access the multiple video streams (in an efficient, threaded manner of course), stitch the frames together, and then perform motion detection on the panorama image.
Updating the image stitcher
In order to (1) create a real-time image stitcher and (2) perform motion detection on the panorama image, we’ll assume that both cameras are fixed and non-moving, like in Figure 1 above.
Why is the fixed and non-moving assumption so important?
Well, remember back to our lesson on panorama and image stitching.
Performing keypoint detection, local invariant description, keypoint matching, and homography estimation is a computationally expensive task. If we were to use our previous implementation, we would have to perform stitching on each set of frames, making it near impossible to run in real-time (especially for resource constrained hardware such as the Raspberry Pi).
However, if we assume that the cameras are fixed, we only have to perform the homography matrix estimation once!
After the initial homography estimation, we can use the same matrix to transform and warp the images to construct the final panorama — doing this enables us to skip the computationally expensive steps of keypoint detection, local invariant feature extraction, and keypoint matching in each set of frames.
Below I have provided the relevant updates to the
Sticherclass to facilitate a cached homography matrix:
# import the necessary packages
import numpy as np
import imutils
import cv2

class Stitcher:
	def __init__(self):
		# determine if we are using OpenCV v3.X and initialize the
		# cached homography matrix
		self.isv3 = imutils.is_cv3()
		self.cachedH = None
The only addition here is on Line 11 were I define
cachedH, the cached homography matrix.
We also need to update the
stitchmethod to cache the homography matrix after it is computed:
# import the necessary packages
import numpy as np
import imutils
import cv2

class Stitcher:
	def __init__(self):
		# determine if we are using OpenCV v3.X and initialize the
		# cached homography matrix
		self.isv3 = imutils.is_cv3()
		self.cachedH = None

	def stitch(self, images, ratio=0.75, reprojThresh=4.0):
		# unpack the images
		(imageB, imageA) = images

		# if the cached homography matrix is None, then we need to
		# apply keypoint matching to construct it
		if self.cachedH is None:
			# detect keypoints and extract
			(kpsA, featuresA) = self.detectAndDescribe(imageA)
			(kpsB, featuresB) = self.detectAndDescribe(imageB)

			# match features between the two images
			M = self.matchKeypoints(kpsA, kpsB,
				featuresA, featuresB, ratio, reprojThresh)

			# if the match is None, then there aren't enough matched
			# keypoints to create a panorama
			if M is None:
				return None

			# cache the homography matrix
			self.cachedH = M[1]

		# apply a perspective transform to stitch the images together
		# using the cached homography matrix
		result = cv2.warpPerspective(imageA, self.cachedH,
			(imageA.shape[1] + imageB.shape[1], imageA.shape[0]))
		result[0:imageB.shape[0], 0:imageB.shape[1]] = imageB

		# return the stitched image
		return result
On Line 19 we make a check to see if the homography matrix has been computed before. If not, we detect keypoints and extract local invariant descriptors from the two images, followed by applying keypoint matching. We then cache the homography matrix on Line 34.
Subsequent calls to
stitchwill use this cached matrix, allowing us to sidestep detecting keypoints, extracting features, and performing keypoint matching on every set of frames.
For the rest of the source code to
panorama.py, please see the image stitching tutorial or use the form at the bottom of this post to download the source code.
Performing real-time panorama stitching
Now that our
Stitcherclass has been updated, let’s move on to to the
realtime_stitching.pydriver script:
# import the necessary packages
from __future__ import print_function
from pyimagesearch.basicmotiondetector import BasicMotionDetector
from pyimagesearch.panorama import Stitcher
from imutils.video import VideoStream
import numpy as np
import datetime
import imutils
import time
import cv2

# initialize the video streams and allow them to warmup
print("[INFO] starting cameras...")
leftStream = VideoStream(src=0).start()
rightStream = VideoStream(usePiCamera=True).start()
time.sleep(2.0)
We start off by importing our required Python packages. The
BasicMotionDetectorand
Stitcherclasses are imported from the
pyimagesearchmodule. We’ll also need the
VideoStreamclass from the imutils package.
If you don’t already have
imutilsinstalled on your system, you can install it using:
$ pip install imutils
If you do already have it installed, make sure you have upgraded to the latest version (which has added Python 3 support to the
videosub-module):
$ pip install --upgrade imutils
Lines 14 and 15 then initialize our two
VideoStreamclasses. Here I assume that
leftStreamis a USB camera and
rightStreamis a Raspberry Pi camera (indicated by
usePiCamera=True).
If you wanted to use two USB cameras, you would simply have to update the stream initializations to:
leftStream = VideoStream(src=0).start()
rightStream = VideoStream(src=1).start()
The
srcparameter controls the index of the camera on your system.
Again, it’s imperative that you initialize
leftStreamand
rightStreamcorrectly. When standing behind the cameras, the
leftStreamshould be the camera to your lefthand side and the
rightStreamshould be the camera to your righthand side.
Failure to set these stream variables correctly will result in a “panorama” that contains only one of the two frames.
From here, let’s initialize the image stitcher and motion detector:
# import the necessary packages
from __future__ import print_function
from pyimagesearch.basicmotiondetector import BasicMotionDetector
from pyimagesearch.panorama import Stitcher
from imutils.video import VideoStream
import numpy as np
import datetime
import imutils
import time
import cv2

# initialize the video streams and allow them to warmup
print("[INFO] starting cameras...")
leftStream = VideoStream(src=0).start()
rightStream = VideoStream(usePiCamera=True).start()
time.sleep(2.0)

# initialize the image stitcher, motion detector, and total
# number of frames read
stitcher = Stitcher()
motion = BasicMotionDetector(minArea=500)
total = 0
Now we come to the main loop of our driver script where we loop over frames infinitely until instructed to exit the program:
# import the necessary packages
from __future__ import print_function
from pyimagesearch.basicmotiondetector import BasicMotionDetector
from pyimagesearch.panorama import Stitcher
from imutils.video import VideoStream
import numpy as np
import datetime
import imutils
import time
import cv2

# initialize the video streams and allow them to warmup
print("[INFO] starting cameras...")
leftStream = VideoStream(src=0).start()
rightStream = VideoStream(usePiCamera=True).start()
time.sleep(2.0)

# initialize the image stitcher, motion detector, and total
# number of frames read
stitcher = Stitcher()
motion = BasicMotionDetector(minArea=500)
total = 0

# loop over frames from the video streams
while True:
	# grab the frames from their respective video streams
	left = leftStream.read()
	right = rightStream.read()

	# resize the frames
	left = imutils.resize(left, width=400)
	right = imutils.resize(right, width=400)

	# stitch the frames together to form the panorama
	# IMPORTANT: you might have to change this line of code
	# depending on how your cameras are oriented; frames
	# should be supplied in left-to-right order
	result = stitcher.stitch([left, right])

	# no homograpy could be computed
	if result is None:
		print("[INFO] homography could not be computed")
		break

	# convert the panorama to grayscale, blur it slightly, update
	# the motion detector
	gray = cv2.cvtColor(result, cv2.COLOR_BGR2GRAY)
	gray = cv2.GaussianBlur(gray, (21, 21), 0)
	locs = motion.update(gray)
Lines 27 and 28 read the
leftand
rightframes from their respective video streams. We then resize the frames to have a width of 400 pixels, followed by stitching them together to form the panorama. Remember, frames supplied to the
stitchmethod need to be supplied in left-to-right order!
In the case that the images cannot be stitched (i.e., a homography matrix could not be computed), we break from the loop (Lines 41-43).
Provided that the panorama could be constructed, we then process it by converting it to grayscale and blurring it slightly (Lines 47 and 48). The processed panorama is then passed into the motion detector (Line 49).
However, before we can detect any motion, we first need to allow the motion detector to “run” for a bit to obtain an accurate running average of the background model:
# import the necessary packages
from __future__ import print_function
from pyimagesearch.basicmotiondetector import BasicMotionDetector
from pyimagesearch.panorama import Stitcher
from imutils.video import VideoStream
import numpy as np
import datetime
import imutils
import time
import cv2

# initialize the video streams and allow them to warmup
print("[INFO] starting cameras...")
leftStream = VideoStream(src=0).start()
rightStream = VideoStream(usePiCamera=True).start()
time.sleep(2.0)

# initialize the image stitcher, motion detector, and total
# number of frames read
stitcher = Stitcher()
motion = BasicMotionDetector(minArea=500)
total = 0

# loop over frames from the video streams
while True:
	# grab the frames from their respective video streams
	left = leftStream.read()
	right = rightStream.read()

	# resize the frames
	left = imutils.resize(left, width=400)
	right = imutils.resize(right, width=400)

	# stitch the frames together to form the panorama
	# IMPORTANT: you might have to change this line of code
	# depending on how your cameras are oriented; frames
	# should be supplied in left-to-right order
	result = stitcher.stitch([left, right])

	# no homograpy could be computed
	if result is None:
		print("[INFO] homography could not be computed")
		break

	# convert the panorama to grayscale, blur it slightly, update
	# the motion detector
	gray = cv2.cvtColor(result, cv2.COLOR_BGR2GRAY)
	gray = cv2.GaussianBlur(gray, (21, 21), 0)
	locs = motion.update(gray)

	# only process the panorama for motion if a nice average has
	# been built up
	if total > 32 and len(locs) > 0:
		# initialize the minimum and maximum (x, y)-coordinates,
		# respectively
		(minX, minY) = (np.inf, np.inf)
		(maxX, maxY) = (-np.inf, -np.inf)

		# loop over the locations of motion and accumulate the
		# minimum and maximum locations of the bounding boxes
		for l in locs:
			(x, y, w, h) = cv2.boundingRect(l)
			(minX, maxX) = (min(minX, x), max(maxX, x + w))
			(minY, maxY) = (min(minY, y), max(maxY, y + h))

		# draw the bounding box
		cv2.rectangle(result, (minX, minY), (maxX, maxY),
			(0, 0, 255), 3)
We use the first 32 frames of the initial video streams as an estimation of the background — during these 32 frames no motion should be taking place.
Otherwise, provided that we have processed the 32 initial frames for the background model initialization, we can check the
lenof
locsto see if it is greater than zero. If it is, then we can assume “motion” is taking place in the panorama image.
We then initialize the minimum and maximum (x, y)-coordinates associated with the locations containing motion. Given this list (i.e.,
locs), we loop over the contour regions individually, compute the bounding box, and determine the smallest region encompassing all contours. This bounding box is then drawn on the panorama image.
As mentioned in last week’s post, the motion detector we use assumes there is only one object/person moving at a time. For multiple objects, a more advanced algorithm is required (which we will cover in a future PyImageSearch post).
Finally, the last step is to draw the timestamp on panorama and show the output images:
# import the necessary packages
from __future__ import print_function
from pyimagesearch.basicmotiondetector import BasicMotionDetector
from pyimagesearch.panorama import Stitcher
from imutils.video import VideoStream
import numpy as np
import datetime
import imutils
import time
import cv2

# initialize the video streams and allow them to warmup
print("[INFO] starting cameras...")
leftStream = VideoStream(src=0).start()
rightStream = VideoStream(usePiCamera=True).start()
time.sleep(2.0)

# initialize the image stitcher, motion detector, and total
# number of frames read
stitcher = Stitcher()
motion = BasicMotionDetector(minArea=500)
total = 0

# loop over frames from the video streams
while True:
	# grab the frames from their respective video streams
	left = leftStream.read()
	right = rightStream.read()

	# resize the frames
	left = imutils.resize(left, width=400)
	right = imutils.resize(right, width=400)

	# stitch the frames together to form the panorama
	# IMPORTANT: you might have to change this line of code
	# depending on how your cameras are oriented; frames
	# should be supplied in left-to-right order
	result = stitcher.stitch([left, right])

	# no homograpy could be computed
	if result is None:
		print("[INFO] homography could not be computed")
		break

	# convert the panorama to grayscale, blur it slightly, update
	# the motion detector
	gray = cv2.cvtColor(result, cv2.COLOR_BGR2GRAY)
	gray = cv2.GaussianBlur(gray, (21, 21), 0)
	locs = motion.update(gray)

	# only process the panorama for motion if a nice average has
	# been built up
	if total > 32 and len(locs) > 0:
		# initialize the minimum and maximum (x, y)-coordinates,
		# respectively
		(minX, minY) = (np.inf, np.inf)
		(maxX, maxY) = (-np.inf, -np.inf)

		# loop over the locations of motion and accumulate the
		# minimum and maximum locations of the bounding boxes
		for l in locs:
			(x, y, w, h) = cv2.boundingRect(l)
			(minX, maxX) = (min(minX, x), max(maxX, x + w))
			(minY, maxY) = (min(minY, y), max(maxY, y + h))

		# draw the bounding box
		cv2.rectangle(result, (minX, minY), (maxX, maxY),
			(0, 0, 255), 3)

	# increment the total number of frames read and draw the
	# timestamp on the image
	total += 1
	timestamp = datetime.datetime.now()
	ts = timestamp.strftime("%A %d %B %Y %I:%M:%S%p")
	cv2.putText(result, ts, (10, result.shape[0] - 10),
		cv2.FONT_HERSHEY_SIMPLEX, 0.35, (0, 0, 255), 1)

	# show the output images
	cv2.imshow("Result", result)
	cv2.imshow("Left Frame", left)
	cv2.imshow("Right Frame", right)
	key = cv2.waitKey(1) & 0xFF

	# if the `q` key was pressed, break from the loop
	if key == ord("q"):
		break

# do a bit of cleanup
print("[INFO] cleaning up...")
cv2.destroyAllWindows()
leftStream.stop()
rightStream.stop()
Lines 82-86 make a check to see if the
qkey is pressed. If it is, we break from the video stream loop and do a bit of cleanup.
Running our panorama builder + motion detector
To execute our script, just issue the following command:
$ python realtime_stitching.py
Below you can find an example GIF of my results:
Figure 4: Applying motion detection on a panorama constructed from multiple cameras on the Raspberry Pi, using Python + OpenCV.
On the top-left we have the left video stream. And on the top-right we have the right video stream. On the bottom, we can see that both frames have been stitched together into a single panorama. Motion detection is then performed on the panorama image and a bounding box drawn around the motion region.
The full video demo can be seen below:
Summary
In this blog post, we combined our knowledge over the past 1.5 months of tutorials and:
- Increased FPS processing rate using threadng.
- Accessed multiple video streams at once.
- Performed image stitching and panorama construction from these video streams.
- And applied motion detection on the panorama image.
Overall, we were able to easily accomplish all of this on the Raspberry Pi. We can expect even faster performance on a modern laptop or desktop system.
See you next week!
If you enjoyed this post, please be sure to signup for the PyImageSearch Newsletter using the form below!
Downloads:
The post Real-time panorama and image stitching with OpenCV appeared first on PyImageSearch.